# Using Remix
This dapp implements a "Hello World" style application that echoes a message passed to the contract to the front end. This tutorial is intended to be followed using the online IDE available at [Remix IDE](https://remix.ethereum.org/).
#### Setting up [Remix IDE](https://remix.ethereum.org/)
* **Remix IDE** is an online IDE to develop smart contracts.
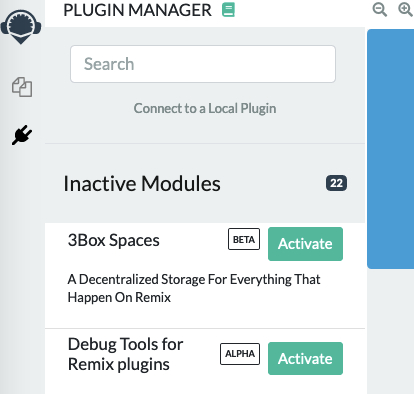
* If you’re new to Remix, You’ll first need to activate two modules: **Solidity Compiler** and **Deploy & Run Transactions**.
* Search for '**Solidity Compiler**' and '**Deploy & Run Transactions**' plugins in the plugin tab in Remix.
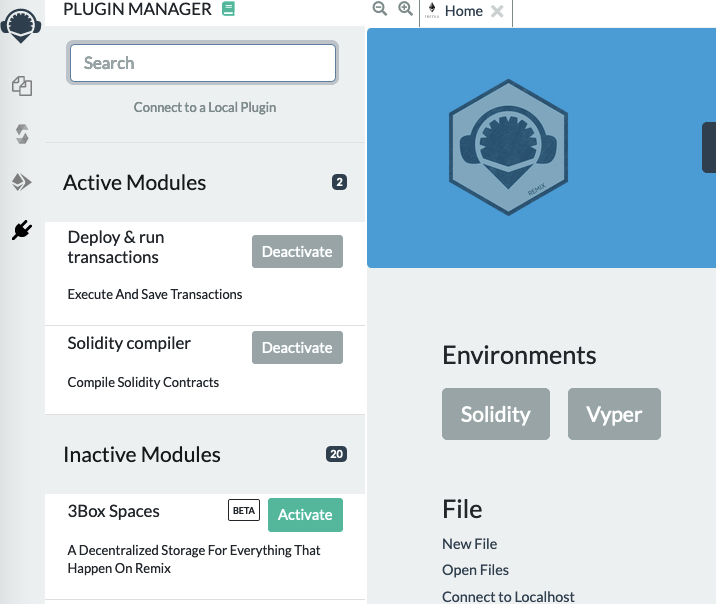
* Activate the two plugins
* Select **Solidity** Environment
* Go to **File Explorers**, and Create a new file , Name it HelloSliceLedger.sol
* Copy/Paste the Smart contract below into the newly created file `HelloSliceLedger.sol`
### **The smart contract**
```
pragma solidity ^0.8.10
contract helloWorld {
string public hello = "Hello World!"
}
```
The first line, `pragma solidity ^0.8.10` specifies that the source code is for a Solidity version greater than 0.8.10. [Pragmas](https://solidity.readthedocs.io/en/latest/layout-of-source-files.html#pragma) are common instructions for compilers about how to treat the source code (e.g., pragma once).
### Compile Smart Contract
* Go to Solidity Compiler.
* Select Compiler Version to 0.8.10.
* Now, Compile **`Hello SliceLedger.sol`**
Now, We have to deploy our smart contract on **SliceLedger Chain** network. For that, we have to connect to web3 world, this can be done by using **Metamask**.
**Please follow this** **tutorial to setup a Metamask Account.**
* Open **Metamask** and select Add Network from the networks dropdown.
* Put in a Network name - “SliceLedger Testnet”
* In URL field you can add the URL as "[https://test-slice-rpc.com](https://test-slice-rpc.com/)["](https://rpc-mumbai.maticvigil.com"/)
* Enter the Chain ID: 1443
* (Optional Fields) Symbol: "SLICE" and Block Explorer URL: "["](https://mumbai.polygonscan.com/%22)
* Go ahead and click save
* Copy your address from Metamask
* Head over to [**Slice Faucet**](https://slicefaucet.io/) and request test SLICE- you will need this pay for gas on **SliceLedger Chain**.
Now, let's Deploy the Smart Contract on **SliceLedger Chain**:
* Select Injected Web3 in the Environment dropdown and your contract
* Accept the Connection Request!
* Once **Metamask** is connected to Remix, the ‘Deploy’ transaction would generate another **Metamask** popup that requires transaction confirmation.
**Congratulations!** You have successfully deployed **HelloSliceLedger** Smart Contract. Now you can interact with the Smart Contract.
Check the deployment status here: [.](https://test.ignitescan.com/)
### **Verifying your Contracts on** SliceLedger**Scan**
The first and foremost step is to flatten the solidity contract into a single file.
#### **Flatten your solidity contract**
* Install [truffle-flattener](https://github.com/nomiclabs/truffle-flattener) or [sol-merger](https://github.com/RyuuGan/sol-merger)
* Flatten using command
`sol-merger \"./contracts/*.sol\" ./build`
#### **Verifying Contract on** SliceLedger**scan**
* Navigate to your contract's **SliceLedgerscan** page and then click verify and publish
* Select `Solidity (Single File)` in compiler type
* Select appropriate compiler version
* Choose the license type of your contract
Onto the next section, paste your flattened contract here.
If you had enabled optimization then adjust the `optimization` section accordingly.
Constructor arguments should have been filled in automatically, if not, they can be retrieved from the trailing bytes of the deployment transaction, they resemble something like `0000000000000000076172d1a6fa476172d1fb5f76172d178d61b04b0ecd319c`
If you have followed the process successfully, the contract would be verified.